Do you ever wish you could get to your little Raspberry Pi computer from anywhere, without needing to plug in a screen or keyboard? Many folks feel this way, wanting to check on their projects or use their tiny machine even when they are not right next to it. It is a common desire, you know, to have that sort of freedom with your small devices.
Perhaps you have a Pi running a home automation system, a personal file storage spot, or maybe it is just a fun learning tool you want to play with while you are out and about. The ability to connect to it over the internet or even just from another room in your house can make a world of difference. It really opens up what you can do with such a small, capable piece of equipment, so.
This guide will walk you through the ways to make that connection happen. We will look at how you can set things up so your Pi is always within reach, no matter where you happen to be. It is actually quite a bit simpler than some people might think, honestly.
Table of Contents
- Getting Your Raspberry Pi Ready for Remote Connections
- How Do You Connect to Your Pi Without a Screen?
- What If You Need a Visual Desktop View?
- Keeping Your Remote Pi Connections Secure
Getting Your Raspberry Pi Ready for Remote Connections
Before you can talk to your Raspberry Pi from somewhere else, you need to make sure it is set up correctly on your local network. This initial preparation is a really important step. It is kind of like making sure your car has gas before you try to drive it anywhere, you know. Your Pi needs to be awake and connected to your home network, first off.
The very first thing to check is that your Pi has an operating system installed and that it is connected to your home internet, either with a cable or wirelessly. Most people use Raspberry Pi OS, which comes with many of the tools we will need already built in. You will want to make sure your Pi is fully updated too, as a matter of fact. A quick trip to the command line on your Pi itself, before you try to connect remotely, can help with this. Just open a terminal window and type in some simple commands to get the latest software pieces. This makes sure everything is fresh and ready for your remote work.
Basic Steps for Remote Pi Access
One key piece of information you will need is your Pi's network address, also known as its IP address. This is a unique number that identifies your Pi on your home network, much like a street address for a house. You can usually find this by typing a command into the Pi's terminal, something like `hostname -I`. Write this number down somewhere, because you will need it when you try to make a connection from another machine. It is a pretty vital bit of data for your remote Pi access.
- Maria Da Graca Lima
- Elizabeth Trump Grau Wikipedia
- Jade Castrinos Drug
- Rustlang Jobs
- Janice Nichole Nudes
Another thing to do for a smooth remote Pi access experience is to set up a fixed IP address for your Pi if you can. By default, your router might give your Pi a different IP address each time it starts up. This can be a bit annoying if you are trying to connect to it, as you would have to find the new address every time. Giving it a static, or unchanging, IP address means it will always have the same number, making it much easier to find later. This is often done through your router's settings, or you can configure it directly on the Pi itself, actually.
You will also want to make sure that the remote access tools are switched on. Raspberry Pi OS comes with a way to turn on things like SSH, which lets you control your Pi using text commands, and VNC, which gives you a full desktop view. These are usually off by default for security reasons. You can turn them on through the Pi's configuration menu, which is a fairly straightforward process. Just look for the "Interfaces" tab, and you will see the options there, you know. Enabling these services is a fundamental part of getting your Pi ready for remote connections, making your remote Pi access possible.
How Do You Connect to Your Pi Without a Screen?
Once your Pi is ready, the most common way to get in touch with it without a screen is through something called SSH. This stands for Secure Shell, and it lets you send text commands to your Pi from another computer. It is a very widely used method for controlling servers and small computers like the Pi, so. It is like having a keyboard and a terminal window right in front of your Pi, even if you are miles away, or just in another room. This method is often the first step people take when they want to manage their Pi remotely.
To use SSH, you will need an SSH client on the computer you are using to connect from. If you are using a Mac or a Linux machine, this is usually built right into the system. You just open up a terminal window and type a simple command. For Windows users, you might need to get a separate program, though newer versions of Windows sometimes have SSH capabilities built in as well. Programs like PuTTY have been popular for a long time for this purpose. It is a fairly simple piece of software to get going, really.
When you type the command to connect, you will need that IP address we talked about earlier. The command usually looks something like `ssh pi@your_pi_ip_address`. The "pi" part is the default username for a Raspberry Pi, but if you changed it, you would use your new username instead. After you hit enter, it will ask for your Pi's password. Once you type that in correctly, you will be logged in, and you will see the Pi's command line, ready for you to type instructions. This is your basic command line control for remote Pi access.
Command Line Control for Remote Pi Access
Being able to control your Pi with text commands opens up a lot of possibilities. You can update software, start programs, check on files, or even shut down your Pi, all from a distance. It is incredibly handy for managing projects that do not need a visual interface, like a home server or a device that collects data. You can perform pretty much any task you would normally do by typing into the Pi's own keyboard. It is a very efficient way to work, honestly, especially if you are comfortable with text commands.
For example, if you wanted to check how much space is left on your Pi's storage, you could type a command like `df -h`. If you wanted to start a program that runs in the background, you could type its name. The beauty of SSH is its simplicity and how little network bandwidth it uses. It is a lean way to interact with your machine, which is great if your internet connection is not the fastest. This direct, text-based method is a core part of remote Pi access for many users.
Remember that when you are done, you should always log out properly. You can do this by typing `exit` into the command line. This closes your connection safely. It is a good practice to get into, just like closing programs on your regular computer when you are finished using them. Leaving connections open unnecessarily can be a bit of a risk, in a way. So, always close your SSH session when you are done with your remote Pi access tasks.
What If You Need a Visual Desktop View?
Sometimes, just using text commands is not enough. Maybe you need to see a program's graphical interface, or perhaps you just prefer working with a mouse and a desktop environment. This is where something called VNC comes into play. VNC stands for Virtual Network Computing, and it lets you see your Pi's entire desktop on your other computer. It is like having a remote screen for your Pi, so you can interact with it just as if you were sitting right in front of it, you know.
To get VNC working, you will need to enable it on your Raspberry Pi first, which we mentioned earlier in the setup steps. Then, you will need a VNC viewer program on the computer you are using to connect from. There are many free VNC viewer applications available for all sorts of computers, whether you are on Windows, Mac, or Linux. They are generally pretty simple to install and use. You just open the viewer, type in your Pi's IP address, and then provide the password you set up for VNC. It is actually quite a smooth process, often.
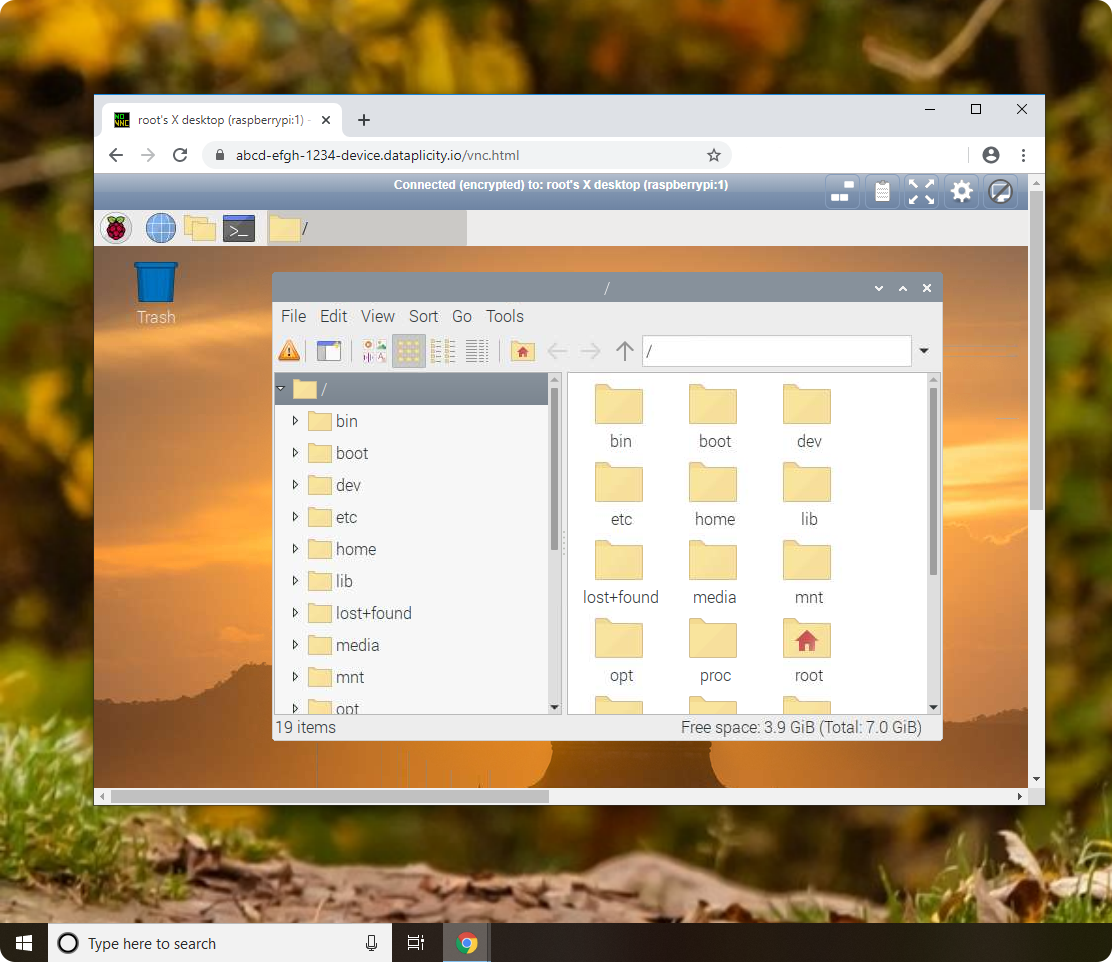
Once connected, you will see the familiar Raspberry Pi desktop appear on your screen. You can open applications, move files around, browse the web using the Pi's browser, or do anything else you would normally do with a mouse and keyboard connected directly to your Pi. This is particularly useful for projects that involve graphical elements, like setting up a media center or working with visual programming tools. It offers a much richer interaction than just the command line, providing graphical access for your remote Pi setup.
Graphical Access for Your Remote Pi Setup
While VNC is incredibly convenient, it does use more network data than SSH. This means if your internet connection is a bit slow, you might notice some delay or choppiness in the picture. It is usually not a big deal for most home networks, but it is something to keep in mind if you are trying to connect over a very weak Wi-Fi signal or a slow mobile data connection. You might find that the experience is a little less snappy than if you were sitting right there, you know.
There are also some settings you can adjust within the VNC server on your Pi, and in your VNC viewer, to try and improve performance. You can lower the screen resolution or reduce the color depth, for instance. These changes can make the connection feel a bit faster, especially if you are working with limited bandwidth. It is all about finding a good balance between visual quality and how quickly the picture updates. This kind of fine-tuning can really help your graphical remote Pi access feel more responsive.
Using VNC is a fantastic way to access your Pi when you need that full desktop experience. It makes working on projects that require a visual interface much easier and more intuitive. It truly gives you the feeling that your Pi is right there, even when it is tucked away in a closet or across the house. So, if you need to see what is happening on your Pi's screen, VNC is definitely the way to go for your remote Pi setup.
Keeping Your Remote Pi Connections Secure
When you open up your Raspberry Pi to connections from other places, even just within your home, it is a good idea to think about keeping things safe. Just like you would lock your front door, you want to put some locks on your digital connections too. This is especially true if you plan to access your Pi from outside your home network. Taking a few simple steps can make a big difference in protecting your Pi and any information on it, you know.
The first and most important thing is to change the default password for your Pi. When you first set up a Raspberry Pi, the default username is usually "pi" and the password is "raspberry". This is very well-known, and anyone could try to use it to get into your Pi. Changing it to something unique and strong is absolutely essential. Pick a password that is hard for others to guess, with a mix of different types of characters. This single step is probably the most impactful thing you can do for protecting your remote Pi access.
Another good practice is to keep your Pi's software updated. Regular updates often include fixes for security weaknesses that bad actors might try to exploit. It is a bit like getting regular check-ups for your own health; it helps keep things running smoothly and safely. You can update your Pi's software through the command line using simple commands. Making this a regular habit, perhaps once a month, is a very good idea for keeping your remote Pi access safe.
Protecting Your Remote Pi Access
If you are going to access your Pi from outside your home network, you might consider using something called SSH keys instead of just passwords. SSH keys are a much more secure way to log in. They involve creating two special files, one that stays on your computer and one that goes on your Pi. When you try to connect, these two files talk to each other to confirm it is really you. It is a bit more involved to set up initially, but it offers a significantly higher level of protection than just a password. This is a pretty advanced step for securing your remote Pi access.
You can also think about changing the default port for SSH. By default, SSH uses port 22. Many automated attacks will try to connect to this port because it is so common. If you change your SSH service to use a different, less common port number, it makes your Pi a little harder for those automated scans to find. It is not a complete solution on its own, but it adds another small layer of security. This is a fairly simple change to make in a configuration file on your Pi, too.
Finally, always be careful about what software you install on your Pi, especially if you are connecting it to the internet. Only get software from trusted sources. Just like you would be careful about what you download to your main computer, the same caution applies to your Pi. A little bit of awareness goes a long way in keeping your entire setup secure. These simple security steps are key for protecting your remote Pi access, allowing you to use it with more peace of mind.
So, we have covered how to prepare your Pi, how to connect using text commands, and how to get a full desktop view. We also looked at ways to keep those connections safe and sound. The ability to reach your Raspberry Pi from anywhere truly opens up a world of possibilities for your projects and everyday use. It makes your little computer a much more versatile tool, letting you interact with it whether you are across the room or across the globe. Getting comfortable with these ways of connecting means you can get the most out of your Pi, always having it ready for whatever you need it to do.
Related Resources:


Detail Author:
- Name : Ray Ward
- Username : kellen43
- Email : genesis.pagac@yahoo.com
- Birthdate : 1975-10-18
- Address : 39637 Astrid Shoal Apt. 006 Sawaynmouth, OH 86981
- Phone : 1-430-967-1537
- Company : Halvorson-Baumbach
- Job : Well and Core Drill Operator
- Bio : Quia amet occaecati perferendis. Ipsum voluptatem adipisci voluptas quia et. Deleniti perferendis sequi corrupti voluptas qui earum. Sed sint eos incidunt magni dolorem.
Socials
linkedin:
- url : https://linkedin.com/in/nicolasb
- username : nicolasb
- bio : Maxime culpa non et rerum quasi.
- followers : 3020
- following : 1268
instagram:
- url : https://instagram.com/nicolasb
- username : nicolasb
- bio : Error facilis deserunt sint nam suscipit voluptas. Est exercitationem qui quia.
- followers : 4613
- following : 871
twitter:
- url : https://twitter.com/nicolas2019
- username : nicolas2019
- bio : Ex in omnis blanditiis quia dicta. Et rem magni laudantium at mollitia qui officia.
- followers : 5569
- following : 2795
tiktok:
- url : https://tiktok.com/@brennan_official
- username : brennan_official
- bio : Sit consequatur accusamus sit labore exercitationem et.
- followers : 5509
- following : 1491
